Everybody loves to play games. A gamer’s dream is streaming like Karljacobs and Cellbit to have millions of followers. These streamers have made a living out of playing Minecraft. Becoming a successful streamer takes skill, presentation, and powerful hardware.
Streaming takes a toll on a PC, and if it’s unable to handle the load, it will lead to substandard video quality or stuttering frames. The number of people watching the stream will drop. Take advantage of the opportunity to sell Hypixel Coins online to earn real-world cash while gaining millions of subscribers. Also, you do not need to spend a fortune to become a streamer. A midrange PC for Minecraft is enough to power enough frame rates to make any game look smooth and sharp on streams.
This article will show which components we should select for a mid-range streaming and gaming PC for Minecraft. After that, we will move to the software that captures your screen and sends it to all the streaming platforms, such as Twitch, YouTube Gaming, and Facebook Gaming. Let’s move to the first part.

Quick Glance at the Steps
Here are the 5 steps for a successful streaming and gaming PC build for Minecraft
- Step 1: Picking the Right PC Parts
- Step 2: Assembling all the Components
- Step 3: Install Windows and Minecraft
- Step 4: Configure Your PC for Streaming
- Step 5: Start Streaming!
We will now discuss each step in detail. The intent is to make the PC build relevant for years to come. The system should be future-proof and have a decent price/performance ratio to land in the mid-range category.
Step 1: Picking the Right PC Parts
Building a PC is a smooth process. It’s fun and easy to do. Also, the satisfying result of self-creation always lifts confidence. Let’s start picking parts one by one:
CPU
Selecting the CPU sets the tone for the remaining hardware components. For a streaming PC, you will need a higher number of threads. It will improve the encoding process, keeping the stream running at high quality. Whereas the number of cores directly affects the game framerates. As for a mid-range PC, we recommend a processor with at least 6 cores and 12 threads. It will easily handle 1080p or 1440p streaming. Anything above the specifications will land in a high-end PC build.

GPU
The GPU or graphics card will handle all the gaming graphics. Minecraft: Bedrock Edition uses ray-tracing technology which drastically improves lighting visuals. You will need a graphics card with a high-end GPU to capture the surreal aesthetics. There are three main competitors, Nvidia, AMD, and Intel.
For Minecraft, Nvidias 60 series graphics cards are best for 1080p gaming and streaming, e.g., RTX 4060. AMD also has a lineup of mid-range GPUs. Just ensure that the 2nd digit in the GPU number is 8, e.g., AMD Radeon 7800. Similarly Intel Arc 5 series is best for advanced gaming.

RAM
The RAM is an essential part of a gaming PC. The RAM storage capacity should be 16GB or more significant for smooth rendering. The storage RAM speed does not directly affect the Minecraft framerates or stream quality. Invest in higher storage capacity than speed. Also, ensure the RAM has a good heatsink and an RGB if you enjoy aesthetics.

Storage
For Minecraft, you need around 1GB of storage space. There are two types of storage devices SSD and HDD. SSD are faster than HDDs, but they cost more. Let’s combine them to create a perfect mid-range PC. Currently, the storage requirements for Windows and Minecraft are around 256GB.
We recommend a 1TB M.2 NVMe drive for fast, reliable storage. The storage requirement for keeping your stream recording should be significant. HDD is a cost-effective solution for long-term storage that you do not need to access often. It could be anything above 1TB, depending on the requirement.

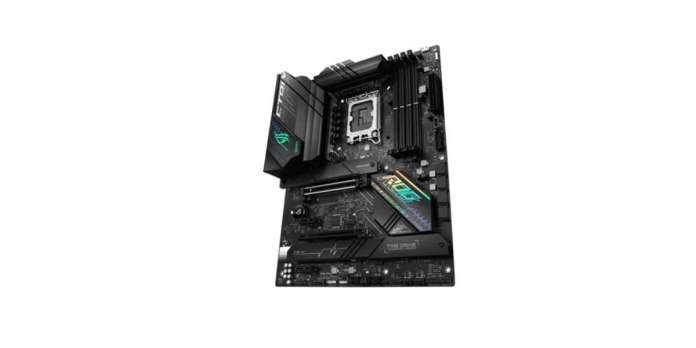
Motherboard
Every hardware that the computer houses communicates or connects to the motherboard. It is the central hub that provides communication protocols for all the hardware. Be sure that the motherboard chipset is compatible with the CPU socket and has all the latest PCIe 5.0 x16 slots, DDR4 or higher RAM slots, M.2 NVMe slots, sufficient USB3.2 or higher ports, and Gigabit LAN or higher.
Case
The case aims to physically allow a secure place to mount all the computer hardware. It should have sufficient fans to circulate air and have a decent front panel with USB connections. The size should be compatible with the motherboard. Gamers with a nick for aesthetics can look for options with RGB.

CPU Cooler
Also, if your processor does not have a bundled cooler, you will need a CPU cooler to remove heat generated when mining in Minecraft. The excessive load by the encoding process causes the CPU to heat up, and installing a good quality CPU cooler helps prolong hardware life.

Power Supply
Finally, you can select a power supply. After you have finalized all the components, use a power supply calculator. It will ask for all the individual component detail and then give you the power supply wattage required for your gaming setup.

Step 2: Assembling all the Components
Assembling all the components requires carefully following each component manufacturer’s instructions. We recommend starting with the motherboard. Before getting into the specifics, ensure you have a clean surface with good lighting and a way to ground yourself. You will also need tools like a screwdriver and a plier if some cutting is required. There are antistatic wristbands that are economical and effective.
- Motherboard: Open the case’s side panel and look for mounting holes. Follow the case instruction manual to set the motherboard in and alight it with the backplate. If your motherboard comes with a pre-installed backplate, follow the motherboard manual to install it.
- CPU: On the motherboard, find the socket using the manual instructions. Place the CPU carefully as haste may bend the pins during the process leaving either of the components to stop working.
- CPU cooler: Most CPU coolers come with a pre-applied paste, so simply place them on following the manual instructions.
- GPU and RAM: Find the PCIe x16 slot and carefully plug in the graphics card. Now connect the RAM in the dimm slot identified in the motherboard manual.
- Storage: M.2 NVMe will mount on the motherboard, and HDD must be placed in the respective mounting place and connected to the motherboard with a data wire. For this motherboard, instructions will guide you as well.
- Power Supply: Finally, when all the components are connected, they need power. Make sure that the power supply fits your case. Then supply power to the HDD, motherboard, GPU, RGB lighting, and CPU fan.
Step 3: Install Windows and Minecraft
You will need a bootable Windows USB drive. The setup will automatically start after you insert the USB drive and boot your PC. Simply follow the on-screen instructions to complete the installation process. Just be sure to install it in the M.2 NVMe storage drive.
After that, visit the Minecraft official website to download and install the game. Run it once to make sure that everything works as planned.
Step 4: Configure Your PC for Streaming
Download the OBS Studio software from the official website. Install the software in the M.2 NVMe drive and move to the next step for configuration.
Set up your Twitch, Facebook, and YouTube account for streaming. Obtain stream keys for each platform. Provide OBS Studio with the keys. Using the OBS Studio website guidelines, you can set your streaming frame, camera, sound, logos, and live statistics.
Step 5: Start Streaming!
Launch your game and open OBS Studio. Click on Start Streaming to begin live streams across all platforms, including Twitch. The process is similar to any other game. For a mid-range gaming PC, 1080p streaming with high-quality encoding is possible. The framerates of your game will remain stable with a decent graphics card.
Final Words
The CPU will process all the encoding. Your LAN will handle all the video streaming load and broadcast to the internet. At the same time, your GPU continues handling all the complex Minecraft graphics to give hyper-realistic lighting conditions and physics. Experiment with different encoding configurations to get the best results. Together they can make any gaming and streaming easy. Tweak with the Minecraft settings too. So let’s build a PC, start steaming and grow followers!